00:00:01
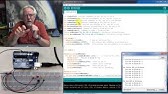
hello guys I'm Paul mcarter and I am
00:00:03
here with Arduino lesson number seven
00:00:06
and in this lesson we're going to be
00:00:07
looking at a new type of loop we're
00:00:09
going to be looking at while loops and
00:00:11
we've done looping before we've done
00:00:13
looping with four loops and the while
00:00:15
loop is not better than a for loop it's
00:00:17
just a little bit different the truth is
00:00:19
you could do almost anything that you
00:00:21
ever wanted to do with a for Loop but
00:00:24
you do need to understand a while loop
00:00:26
because there might be a few unique
00:00:27
circumstances that a while loop would be
00:00:29
better than a for Loop and also you
00:00:31
might be looking at someone else's code
00:00:33
and you might see this and think well
00:00:34
gee what's that about and so a while
00:00:37
loop is just another way to Loop okay
00:00:39
Some people prefer for Loops Some people
00:00:42
prefer while Loops 99% of the time a job
00:00:46
you could do with either a for Loop or a
00:00:48
while loop just to kind of catch you up
00:00:50
where we are we are still working on
00:00:52
this 2 LED circuit the two LED circuit
00:00:55
if you need help hooking this up we
00:00:57
really went through it in quite a bit of
00:00:59
detail in lesson number three you can
00:01:02
see the link down in the description of
00:01:03
this video I will give you uh you can go
00:01:06
there and go to lesson three and you can
00:01:08
see to how to hook this circuit up and
00:01:10
then also if you look at our resources
00:01:13
for uh lesson number seven which we're
00:01:15
on now you can get this code that we've
00:01:18
been building in this series of lessons
00:01:20
Okay you can kind of see what I'm doing
00:01:21
here every lesson I just build a little
00:01:23
bit on uh on the previous lesson and so
00:01:26
far we haven't changed the circuit a a
00:01:29
lot because basically it's hard to learn
00:01:31
circuits and programming at the same
00:01:33
time so so for right now in these
00:01:35
lessons we're kind of working with this
00:01:37
circuit and we're learning a lot of
00:01:39
programming very quickly though we're
00:01:41
going to have these core programming
00:01:42
skills and then we're going to start
00:01:43
expanding what we're doing on the
00:01:45
circuit side so as you go through this
00:01:47
series of lessons we're going to be over
00:01:49
here learning about programming and then
00:01:50
over here learning about circuits and
00:01:52
always our circuits and our programs
00:01:54
working uh working together but for
00:01:56
right now we're going to do a couple
00:01:57
more lessons still with this to uh with
00:02:00
this two uh LED circuit so again go to
00:02:03
lesson three if you need help getting
00:02:06
that uh hooked up go to lesson 7 and you
00:02:10
can get this code so you can catch up
00:02:12
with uh with where we are if you have
00:02:14
not uh not been working with
00:02:16
us what we did in the last lesson is
00:02:18
basically we've got a lot of programming
00:02:21
tools under our belt already and it's
00:02:23
starting to get pretty uh pretty fancy
00:02:25
what we can do uh basically if we look
00:02:28
at this code
00:02:30
up here at the top we declare our
00:02:32
variables then in our void setup we put
00:02:35
the things in the void setup that we
00:02:36
want to do one
00:02:38
time the void set up like all clauses
00:02:41
they're sort of like a paragraph it
00:02:43
starts with the open curly bracket and
00:02:45
it ends with the closed curly bracket so
00:02:47
everything between those curly brackets
00:02:49
is the void
00:02:50
setup what we do is we turn the serial
00:02:54
port on we do our pin modes right
00:02:57
anytime you're going to use an a pin in
00:02:58
Arduino you need to tell it whether it's
00:03:00
going to be an output or an input then
00:03:03
we prompt the user for information we
00:03:07
print out to the user's serial monitor
00:03:10
how many times do you want the red LED
00:03:11
to
00:03:13
Blink then we wait for him to answer and
00:03:16
then we read his answer into the
00:03:18
variable num red blinks we do the same
00:03:20
thing for the yellow blinks so we find
00:03:23
out how many times he wants to Blink and
00:03:26
then we blink the red LED and then we
00:03:28
blink the yellow LED
00:03:32
in this particular version of the
00:03:33
program we prompt the user for the
00:03:36
number of blinks in the void setup so
00:03:38
once he enters it then it just goes it
00:03:40
blinks the red one then it blinks the
00:03:41
yellow one it blinks the red one it
00:03:42
blinks the yellow one if we wanted to
00:03:44
change that every time these inputs or
00:03:47
these
00:03:48
prompts we would go ahead and put in the
00:03:51
void Loop instead of the Void setup and
00:03:52
that that way every time through the
00:03:54
loop it would ask the user for input but
00:03:57
the the point is that at this point we
00:03:59
can go out and we can get information
00:04:01
from the user we can do something based
00:04:04
on that information and then we can send
00:04:06
information back out to the user so all
00:04:08
of a sudden we're getting a lot of these
00:04:09
puzzle pieces put together let's just
00:04:11
take a quick look at this program see
00:04:13
what it's doing now we download the
00:04:16
program uh we interact with the user
00:04:19
right now through the serial monitor
00:04:21
remember we always turn the serial
00:04:22
monitor on if we're going to use it and
00:04:24
we turn the serial monitor on with a
00:04:26
serial. begin and we can call up that
00:04:29
serial Monitor and then it asks me how
00:04:32
many times do you want the red LED to
00:04:33
Blink I think
00:04:36
five don't want to play favorites here
00:04:38
so the yellow one we're going to Blink
00:04:40
five times as well
00:04:42
okay now you notice the red is going to
00:04:45
Blink five and then the yellow blinks
00:04:47
five and in synchronized with that
00:04:50
blinking over here we're printing out to
00:04:53
the serial monitor we're printing out
00:04:55
which led is blinking and which blink
00:04:57
we're on so you see we're getting a lot
00:04:58
a lot of these little pieces uh a lot of
00:05:00
these little pieces working together now
00:05:03
well the truth is is that there's
00:05:05
another type of loop that you can do you
00:05:08
can see here the way we did this was we
00:05:10
did it with a for Loop the four Loop
00:05:12
here is blinking the red and then the
00:05:15
four Loop here is blinking the yellow
00:05:17
and the way the four Loop works is we
00:05:20
just say four and then we set some
00:05:23
integer we call it J it could have been
00:05:25
I it could have been Z it could have
00:05:27
been your name it could have been
00:05:28
anything but this count we set it we
00:05:30
tell it to start at
00:05:32
one we tell it to keep going through
00:05:34
this loop as long as that variable J is
00:05:38
less than or equal to this number and
00:05:40
then we tell it every time that it goes
00:05:42
through we want it to increment J by one
00:05:44
and so this is the condition it is going
00:05:47
to keep looping as long as this
00:05:50
condition is true okay the loop starts
00:05:53
with the open curly bracket and the loop
00:05:56
ends with the closed curly bracket okay
00:05:59
that's what we've sort of been calling a
00:06:01
clause it's like a a little group of
00:06:03
that's inside those curly brackets that
00:06:05
all sort of uh uh happens uh happens
00:06:08
together happens in sequence okay so
00:06:11
that's that's how a for Loop works and
00:06:12
that's uh that's pretty neat but there's
00:06:14
another type of loop that we can do and
00:06:16
it's called a while
00:06:19
loop so let's take a look at a while
00:06:21
loop I'll just open up a new window here
00:06:24
and we'll just write a really minimal
00:06:26
program to kind of show you how a while
00:06:28
loop works we're not going to be doing
00:06:30
any blinking of the LEDs with this so we
00:06:32
don't need to go in and do any pin modes
00:06:34
or declare a lot of variables the one
00:06:36
thing we do need to do though is we need
00:06:38
to open our serial monitor so we do a
00:06:40
serial.
00:06:43
begin okay and the serial the S is
00:06:46
capital let's go
00:06:49
115,200
00:06:52
and then ending in a colon semicolon
00:06:56
okay that's about all we probably need
00:06:58
to do right now in the void setup let's
00:07:00
come down here to the void Loop this is
00:07:02
how you do a while loop if you're going
00:07:05
to do a while loop you probably need a
00:07:07
counter and so we need to have some sort
00:07:10
of counter usually we call a counter
00:07:12
either I or J or CNT let's go ahead and
00:07:15
call it
00:07:15
J so I'm going to declare a counter
00:07:20
J and it's an INT and so I've declared
00:07:23
my variable J as an INT I've created the
00:07:26
bucket I've labeled the bucket J and
00:07:30
I've told it that that bucket is going
00:07:31
to contain
00:07:33
ins I'm going to go ahead and put a
00:07:35
number in the bucket I'm going to set it
00:07:38
equal to one
00:07:41
okay now you could declare that variable
00:07:43
up at the very top before the void setup
00:07:46
if you did it would be a global variable
00:07:48
and all the programs would be working
00:07:51
with that same value of J A lot of times
00:07:54
it's good to not use Global variables
00:07:56
but to use local variables and if the
00:07:58
only thing that really needs to know
00:08:00
about this J as this while loop I'm
00:08:02
fixing to make then maybe it makes more
00:08:04
sense to make it a local variable and
00:08:06
declare it here inside the void Loop so
00:08:09
we now have a
00:08:10
counter and that counter variable we
00:08:13
have called J and we have initialized
00:08:15
that counter to one so let's be good
00:08:17
boys and girls and let's put our comment
00:08:19
in here uh we're going to
00:08:22
declare that J is an INT and set it
00:08:29
equal to one okay now this is where
00:08:34
we're going to do our while loop and the
00:08:36
way a while loop is I'm going to put a
00:08:38
white line there just to make it a
00:08:40
little easier to see what I'm doing
00:08:41
we're going to say while and we're going
00:08:43
to turn the phone off sorry okay we are
00:08:48
going to let me uh get that off so it
00:08:58
doesn't
00:09:00
okay we are going to sorry about that
00:09:04
we're going to start our while loop with
00:09:06
the word while and then we will put some
00:09:09
condition we will come back and put some
00:09:12
condition between these parentheses and
00:09:16
this Loop will continue to execute as
00:09:20
long as that condition is true so now
00:09:23
what I'm going to do is I'm going to
00:09:24
come in and I'm going to start my while
00:09:26
loop it starts with a curly bracket and
00:09:29
it's going to end with a closing curly
00:09:32
bracket and anytime I make a loop
00:09:34
whether it's a while loop or a for Loop
00:09:36
or any type of claws I put that ending
00:09:40
curly bracket in right when I create the
00:09:42
loop okay because if you don't you're
00:09:45
going to come in here and you're going
00:09:46
to write a lot of code and then you're
00:09:48
going to not you're going to forget to
00:09:49
put your curly bracket there and then
00:09:51
you're going to see this and say oh I
00:09:53
got a curly bracket problem is this
00:09:55
curly bracket goes with this one this
00:09:59
this one opens the void Loop this one
00:10:01
closes the void Loop this one opens the
00:10:04
while uh loop and this one closes the
00:10:06
while loop so anytime I put a loop in I
00:10:09
go ahead and I put my starting bracket
00:10:10
and my ending uh my starting curly
00:10:12
bracket and my ending curly bracket and
00:10:14
so now this Clause is going to continue
00:10:18
to execute as long as the conditional
00:10:22
that you put in here is true okay so
00:10:26
let's put a conditional in here we're
00:10:29
going to say keep looping as long as J
00:10:33
our counter is than or equal to let's
00:10:36
say 10
00:10:38
okay so this is going to keep looping as
00:10:41
long as J is less than or equal to 10
00:10:44
and then I'm going to come down here and
00:10:45
I'm just going to do a print serial.
00:10:48
print and I want it to increment to the
00:10:50
next line each time so I'm going to say
00:10:52
print
00:10:53
Ln like that and then what am I going to
00:10:55
print I'm going to print the variable J
00:10:58
I'm I'm
00:10:59
the J does not go in quotes because J is
00:11:01
a variable I don't want it to print the
00:11:03
character J I want it to print the
00:11:05
variable J you remember the J bucket
00:11:08
what's in the J bucket that's what I
00:11:10
want to see so I just say print line J
00:11:13
and then all of our commands we in with
00:11:15
a colon all right now I want you to look
00:11:19
at this and think for just a second what
00:11:21
would happen if we ran this right now
00:11:22
just look at it and ponder it for a
00:11:26
second well we come up J is equal to 1
00:11:30
so is J less than or equal to 10 yes it
00:11:33
prints J and then it comes back is J
00:11:35
less than or equal to 10 yes it prints J
00:11:37
it prints J it prints J it's prints J
00:11:39
there's no way for it to break out of
00:11:40
this Loop because J is staying at the
00:11:42
value one and so what we've done here is
00:11:45
we created an infinite Loop and if we
00:11:47
ran it it would just sit and print out
00:11:50
the number one forever so what you got
00:11:52
to do when you write a while loop is you
00:11:55
got to make sure you're doing something
00:11:56
that let you break out of the loop and
00:11:58
what you typically do is you increment
00:12:00
your counter J is equal to J +
00:12:04
1 so the first time through J is one
00:12:08
when you get to the bottom Loop J is
00:12:10
equal to 1 + 1 which becomes two and
00:12:12
then the next time through three 4 5 6 7
00:12:16
8 n and then 10 well is J less than or
00:12:20
equal to 10 yes it goes through the 10th
00:12:22
time it adds one to J when it comes back
00:12:25
up here at that point J is 11 it does
00:12:28
not enter the loop it comes down here
00:12:30
and it just does the next line after the
00:12:33
end of the loop so it keeps looping as
00:12:36
long as J is less than or equal to 10
00:12:38
and each time J is equal to J + 2 Okay
00:12:42
so let's go ahead and run this and o o
00:12:45
forgot my colon why didn't somebody say
00:12:47
you forgot your colon semicolon all
00:12:49
right now let's
00:12:53
see looks like things are happy let's
00:12:55
look at our serial Monitor and look at
00:12:58
that
00:13:00
printing a lot of numbers but it's
00:13:02
printing so fast we can't really see it
00:13:03
so one of the things you see is
00:13:06
computers can run a lot faster than we
00:13:08
can keep track of them and so if we want
00:13:10
to be looking at these numbers we need
00:13:11
to put something in there to slow it
00:13:13
down and so let's slow it down let's put
00:13:15
a delay in this Loop of about 250 so
00:13:18
that it will kind of pause about a
00:13:21
quarter of a second remember these
00:13:23
delays are in milliseconds so it'll
00:13:24
pause at about a quarter of a second and
00:13:26
so we can see the numbers coming by a
00:13:28
little B better all
00:13:30
right download the program it's green
00:13:34
everybody's happy now let's look at our
00:13:36
serial Monitor and look at that 1 2 3 4
00:13:39
5 6 7 8 9 10 1 2 3 4 5 6 7 8 9ine 10 and
00:13:44
so it is looping through there why does
00:13:46
it repeat well it repeats because after
00:13:48
it does it it comes down and we're in
00:13:50
the void Loop so it comes back it runs
00:13:52
the void loop again and then it Loops
00:13:54
through the while loop here and so it's
00:13:56
looping through the while loop and the
00:13:58
void Loop and that's why the numbers 1
00:14:00
through 10 keep repeating one of the
00:14:02
things is I think once you do something
00:14:04
usually as far as formatting your output
00:14:06
once you do something inside of that uh
00:14:10
while loop when you leave it's good to
00:14:12
put like print a blank line so you can
00:14:14
see which group of code or which group
00:14:16
of print out came from inside that Loop
00:14:19
and so a lot of times what I will do is
00:14:20
I will just after it do a serial. print
00:14:24
print line and then just print a blank
00:14:27
just an empty l
00:14:29
line and that makes it a little easier
00:14:31
to read the code as it goes what did it
00:14:34
not print oh that's not even close print
00:14:37
line p r i n t
00:14:40
Ln all
00:14:41
right looking green looking happy okay
00:14:45
there we go let's look at this and so
00:14:48
now we count to
00:14:50
10 and then we get a blank line in there
00:14:52
you see it makes it a little easier to
00:14:54
see those groups of 10 and we've we've
00:14:56
slowed it down so it sort of makes it it
00:14:58
sort of makes makes it a little bit
00:14:59
nicer a little bit easier to read okay
00:15:04
now let's practice a little bit with our
00:15:07
format formatting of our output instead
00:15:09
of just printing J if a person uh just
00:15:12
came and saw this they might not really
00:15:14
know what those numbers are and so let's
00:15:17
put it in conjunction with a a string
00:15:19
that says you are on uh loop number okay
00:15:23
so when I come here I'm going to add
00:15:26
another uh text uh PR out a text string
00:15:29
so I'm going to say serial.print line
00:15:32
and if I want to print a string just
00:15:34
plug a string in here I need to put it
00:15:36
in the double quotes you are on Loop
00:15:41
Loop
00:15:43
number and
00:15:45
then close the quotes close the
00:15:48
parentheses add the semicolon so let's
00:15:51
see what this is going to do
00:15:55
now we're just practicing stuff here
00:15:57
that we've learned for the while loop is
00:15:59
new but we're just practicing some of
00:16:01
this formatting business okay so here we
00:16:03
go you are on Loop Number One you are on
00:16:05
Loop Number Two Three okay let's stop
00:16:08
that from scrolling do you see how this
00:16:10
is not I mean you normally don't write
00:16:12
sentences that way you would really like
00:16:13
the eight to be here on the same line as
00:16:17
that and that way it would be easier to
00:16:19
read so how would I get this this line
00:16:22
This print command and this print
00:16:23
command to print on the same line well
00:16:26
don't Advance the line on the first
00:16:29
print so we just say serial print
00:16:31
instead of Serial print Ln and it'll
00:16:34
print this stay on that line and then it
00:16:36
will print this and I bet this looks a
00:16:38
little bit neater if we do
00:16:42
this okay let's take a look at
00:16:46
it all right you are on Loop three four
00:16:49
five Okay now what's wrong with this
00:16:51
okay and this happens quite a bit that
00:16:54
is you see I put that and then the one
00:16:56
and there's no space there there's no
00:16:57
space there cuz I didn't tell it to put
00:16:59
a space there I just ended right with
00:17:01
that R and then the J comes in right
00:17:04
after that so we should put a space
00:17:06
right
00:17:09
there let's try it
00:17:11
again oh got to download it all
00:17:19
right okay so let's take a look at it
00:17:23
now you are on Loop you
00:17:27
see
00:17:29
and there it is Loop Number One 2 3 4 5
00:17:32
6 Seven 8 n so you see this is the same
00:17:34
every time and then because we just
00:17:36
printed out a a string we just plug the
00:17:39
string in and here we're printing out a
00:17:41
variable and every time through J is
00:17:43
equal to something different okay now
00:17:45
you can get creative and with these with
00:17:47
these while Loops you can do different
00:17:49
things depending on your application and
00:17:51
so let's say I wanted to know all of the
00:17:55
even numbers between one and 20 okay so
00:18:00
I start with J is equal to J uh here
00:18:03
let's start with J equal two so you see
00:18:07
we don't have to we don't have to start
00:18:10
with one we can start with two and we
00:18:13
don't have to increment by one we can
00:18:15
increment by two okay so it's still
00:18:18
going to have the same condition it is
00:18:20
going to print as it's going to go
00:18:21
through here as long as J is less than
00:18:23
or equal to 10 let's go ahead and make
00:18:25
that 20 this time so as long as J is
00:18:27
less than or equal to 20 it's going to
00:18:29
go through here but this time it's going
00:18:31
to increment J by two instead of by one
00:18:34
and it's going to start at two so let's
00:18:36
take a look at that this is just showing
00:18:38
you don't always have to start at one
00:18:39
and end at a specific number and you
00:18:41
don't always have to increment by one
00:18:43
different things that you can do
00:18:45
here okay look at that 2 4 6 8 10 12 14
00:18:52
16 18 20 2 4 6 8 10 12 14 168 20 you see
00:18:55
we're counting by twos this time because
00:18:58
we're we're incrementing by two well
00:19:00
let's let's count by fives okay let's
00:19:03
count by fives let's start at
00:19:05
zero and let's count by fives and let's
00:19:09
go all the way up to 100
00:19:13
okay download
00:19:20
it okay 5 10 15 20 look at that counting
00:19:24
by fives me turn the scroll on 5 10 15
00:19:28
20 25 can hardly go that fast but you
00:19:32
see if you look there I'm now counting
00:19:33
by fives so you have a lot of
00:19:35
flexibility and what you do inside of
00:19:38
this for Loop uh I mean inside of this
00:19:40
while loop but basically you put the
00:19:43
condition here as long as this condition
00:19:44
is true it will continue to execute the
00:19:46
Clause the Clause starts with the
00:19:49
beginning curly bracket and it ends with
00:19:51
the ending curly bracket okay so this is
00:19:56
uh this is some pretty neat stuff here
00:19:58
I'm trying to think if there's anything
00:20:00
else I need to show you with the while
00:20:01
loop I think you can kind of figure it
00:20:03
out from here let me see if I can go
00:20:06
back to that original program and this
00:20:08
was the program as it ex as it sort of
00:20:12
was at the end of lesson six remember
00:20:17
this is our blinking LED
00:20:20
program let's run
00:20:23
that let's call up our serial monitor
00:20:26
okay how many times do you want to blink
00:20:28
the red LED let's say
00:20:30
five how many times do you want to Blink
00:20:32
the yellow LED let's say five and then
00:20:35
let's send it and then when we come over
00:20:38
here it's going to BR blink the red one
00:20:39
five and the yellow one five okay so
00:20:41
this is what we did in lesson six but in
00:20:44
lesson six we did it with four Loops
00:20:48
well this time let's do it with a while
00:20:51
loop okay because I think there are a
00:20:53
couple of things that you need to you
00:20:54
need to pay attention to here and so I
00:20:57
can keep the CL claws the same pretty
00:20:59
much because my my for Loop claws began
00:21:02
here and ended here well I'm going to
00:21:04
leave that that that claws there but
00:21:07
then here I'm going to replace the for
00:21:09
loop with a while loop so I'm going to
00:21:11
say while and then I put some condition
00:21:15
in there and then it's going to go from
00:21:17
here to here well while what well let's
00:21:22
say while J
00:21:25
is less than or equal to I'm not going
00:21:28
to put in 10 because remember the number
00:21:30
of blinks that I want was num red blinks
00:21:34
so I'm going to come here and I'm going
00:21:36
to say num red
00:21:39
blinks and then we should say here this
00:21:41
is just a comment but let's keep our
00:21:43
comments good so we're going to say
00:21:44
start our while loop this time
00:21:47
okay start our while loop okay now
00:21:54
what let's just see I'm going to run
00:21:56
this and see what happens while J is
00:21:58
less than or equal to numb blinks let's
00:21:59
see what happens if we try to run this o
00:22:02
it doesn't like this I got an error and
00:22:04
it says J was not declared in this scope
00:22:08
okay I can't just come in and start
00:22:10
using J if I'm going to use J I've got
00:22:12
to declare it and I did not declare it
00:22:14
up here at the top so the first time the
00:22:16
Arduino ever heard about J was right
00:22:18
here and it says what's this J business
00:22:20
I don't know Jay nobody ever told me
00:22:22
about J what's he doing in here okay so
00:22:25
if we're going to use J we've got to
00:22:26
declare it we could declare it up here
00:22:28
but again it would make more sense to
00:22:30
make it a local variable because we're
00:22:32
not really needing to pass it around
00:22:34
between things and so we're going to
00:22:35
start right here and since it hasn't
00:22:38
seen it we've got to declare it that J
00:22:40
is an INT int
00:22:43
J and since we're going to use J here we
00:22:46
better give it a value right and so
00:22:48
let's give it a value of equal to one
00:22:51
and then let's end in a colon so here we
00:22:53
say in J is equal to one and so now it
00:22:56
is going to be happy
00:22:58
right
00:23:00
well maybe not okay maybe not let's just
00:23:05
see what happens I hope I don't get this
00:23:07
thing hung where I can't stop
00:23:12
it okay so let's come up here and see
00:23:16
how many times you want to Blink red I
00:23:18
want to Blink it five how many times do
00:23:20
you want to Blink yellow I want to blink
00:23:22
blink it five and then you are on blink
00:23:25
one one one one whoa what's going on one
00:23:28
one one and look at that that's more
00:23:30
than five blinks it just keeps blinking
00:23:32
blinking blinking blinking blinking
00:23:33
blinking so we have a problem here and
00:23:36
what the problem is I said J is equal to
00:23:39
one and I said keep blinking as long as
00:23:42
J is less than or equal to non blinks
00:23:44
and then I just blink it what did I not
00:23:47
do I didn't increment J so J stayed at
00:23:50
one and so if we went back and looked at
00:23:52
the serial monitor it's just staying at
00:23:54
one and this red LED over here is going
00:23:57
to Blink forever because there's way for
00:23:59
it to get out of this Loop if I'm going
00:24:01
to do a while loop with a conditional
00:24:03
like that I have to be responsible to
00:24:06
increment J J is equal to J + 1 okay and
00:24:11
with a semicolon and now let's put that
00:24:13
in
00:24:16
there it looks like things are going to
00:24:18
be happy and then let's come up and
00:24:21
we're going to say five for the red
00:24:23
blinks we're going to say five for the
00:24:25
yellow blinks one two
00:24:28
[Music]
00:24:29
one two three four five one two three
00:24:33
four five so it looks like it's working
00:24:36
now and I have got a little bit of a
00:24:38
glitch in there and I am not exactly
00:24:41
sure why it's doing that one of the
00:24:43
problems that I have is and I've
00:24:44
mentioned this before that to have the
00:24:46
Arduino over here and my computer is
00:24:48
over there I've got a really long USB
00:24:50
cable and I think maybe that I have got
00:24:53
a little glitch coming from that long
00:24:55
USB cable but you can see that it's
00:24:56
working now that basically it's telling
00:24:59
me which blink I'm on and it's blinking
00:25:00
the right number of times and so I took
00:25:02
that same function that I was doing in a
00:25:04
for Loop but now I've done it with a
00:25:07
while loop so what your assignment is
00:25:09
your assignment is to come in and fix
00:25:12
this one where it is working with a
00:25:14
while loop as well and so you got both
00:25:17
of these programs working with a while
00:25:18
loop but one of the things I've got to
00:25:20
warn you that you got to be careful of
00:25:22
when you come out of this J is going to
00:25:25
be equal to what well the last time it
00:25:27
on the 10th time through the loop J is
00:25:30
10 and then at the bottom J goes from 10
00:25:33
to 11 it comes back up here as that says
00:25:36
is J less than or equal to I mean numb
00:25:39
blinks let's just say it was 10 no it's
00:25:41
11 now so it's going to jump down here
00:25:43
and it's going to be right here and then
00:25:47
what you got to remember is you got to
00:25:48
remember to go back and set J equal to
00:25:50
one because it's j is equal to one here
00:25:52
but this is going to ramp it all the way
00:25:54
up to 10 or whatever you set num blinks
00:25:56
to Plus one more for the last time
00:25:59
through the loop and then you're going
00:26:00
to come through here and this one's
00:26:02
never going to execute unless you go
00:26:04
back and set J equal to one here so
00:26:06
always right before you start a loop if
00:26:09
you're doing a counter like this make
00:26:10
sure that you initialize your counter
00:26:12
and a lot of times when I'm helping
00:26:14
students with their code on a problem
00:26:15
like this they would forget to come down
00:26:17
here and uh they would forget to come
00:26:20
down here and reinitialize their J the
00:26:23
only reason I tell you that is I don't
00:26:25
want you to get stuck and I'm if you're
00:26:27
not here in my classroom I would not be
00:26:29
there to to help you figure out what was
00:26:30
going on and so I warn you always before
00:26:33
you initialize your while loop uh before
00:26:37
you start your while loop make sure that
00:26:39
you initialize your variable whatever
00:26:41
the counter is going to be okay again
00:26:43
thank you this is lesson seven I look
00:26:45
forward to see you seeing you guys very
00:26:48
shortly on lesson eight hope you guys
00:26:49
are enjoying this stick with it we're
00:26:52
going to get to some more interesting
00:26:53
stuff here really
00:26:54
soon